|
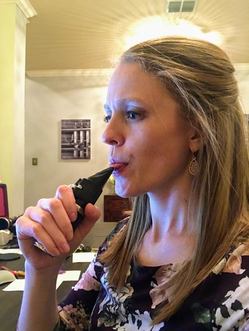
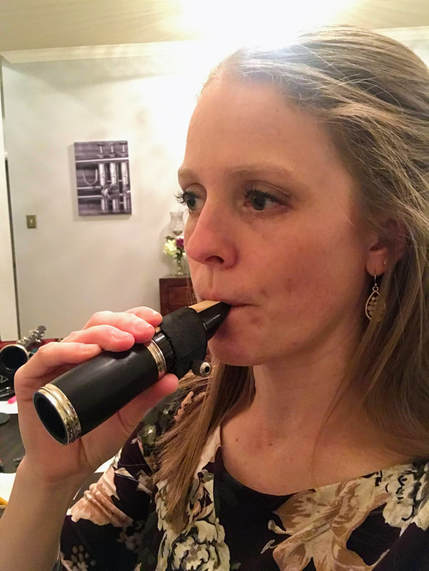
By Alicia DeSoto I’ll be honest, it wasn’t until the end of my freshman year of high school that a new private lesson teacher really taught me how to tongue. I had spent almost 5 years becoming sufficient at stopping my air to “articulate” before my new teacher finally stopped and showed me how to actually use my tongue for tonguing. I had a painful few months of relearning before my fingers and tongue finally lined up at an appropriate speed. To say that I’m fanatical about making sure all of my students can tongue properly would be an understatement! I’m going to discuss how I teach my clarinet students to articulate, because I think clarinet has the trickiest tonguing technique, due to the angle of the mouthpiece and the firmness of the embouchure. The other reed instruments have a more “straight in” reed angle, while the clarinet reed is pointing up at a higher angle, making it more likely for a student to miss the tip of the reed and thwat tongue too much of the reed. When to introduce tonguing? We don’t start tonguing in clarinet class until everyone is initiating and sustaining a consistent Concert F# on the mouthpiece and barrel. There are plenty of other upper joint and even entire clarinet exercises we can do while students are developing their embouchure muscles to maintain this pitch. If students are too low in pitch when introducing tonguing, the pitch will only get worse and not have the isolated opportunity to improve. We started tonguing in clarinet class about a week ago. 9/28 to be exact. A Friday would not have been my first choice to introduce as I would have preferred a follow up day to check for any weird habits and give additional reinforcement, but we weren’t ready on Wednesday and didn’t have class on Thursday due to our modified block schedule. So Friday it was! How to introduce? We start by saying “Tee” as fast as we can. Then we sort of say “Tee” into a fast airstream onto the palm of our hand. Next, I have the students stick their tongues out and put the tip of the clarinet reed (of their mouthpiece and barrel) onto the tip of their tongue. By sticking their tongues out to do this, I can make sure the students are aware of the two items (tongue and reed) that need to make contact. Next, I show the students that when I form an embouchure and place the tip of my tongue on the tip of the reed, and then blow out, no sound will happen, no matter how fast I blow, because the tongue is preventing the reed from vibrating. Then I have them try the same thing: put the tongue on the reed and blow (but don’t move the tongue off the reed). This confirms that the students are actually using the tongue to stop the vibration while they are blowing, and not stopping the sound due to lack of air. I then use my hand as an indicator for the tongue placement. An open hand means no tongue on the reed, and a closed fist means tongue on the reed. I have the students start with their tongue on the reed and blow fast air (my fist is closed), and then I open and close my hand as they move their tongue on and off the reed, all while blowing super fast. Final step: tongue as fast as they can. I make sure the students are tonguing quickly as soon as possible to ensure that their air is never stopping or slowing down, or that their throat isn’t tightening up. Tonguing slower rhythms like half notes and quarter notes gives the students too much time for their air to slow down between notes. Try to get students tonguing at least 3 fast notes right away, and then eventually slow the rhythms down while encouraging fast air through and between the notes. All of this is done without music and just on the mouthpiece and barrel. You will notice that even your best players lose a little bit of their embouchure control when they start tonguing. Students can only focus on one new skill at a time, so while thinking about the newest skill, the previous ones will initially deteriorate. After a few days, the pitch will return. Students will benefit from using a mirror to make sure their jaw isn’t moving while tonguing, or that nothing is moving their throat. Students can also put their left hand on their chin while tonguing to double check that it is firm and not moving. Constantly model and echo with students as they are learning how to tonguing. Describing tongue motion, air speed, embouchure musculature, soft palate and aural cavity voicing will only go so far. Often, just saying “Sound like this” will be significantly more effective and efficient. I continue to model mouthpiece and barrel echoes daily for the entire beginner band year, and into my 7th/8th grade clarinet sectionals. My Favorite Tonguing “Trick” One of my favorite go-to tricks in clarinet class is to turn the mouthpiece and barrel upside down. This puts the reed up against the top lip, and the mouthpiece itself resting on the bottom lip. Students will need to curl in their top lip over their teeth (like a double reed player) to utilize this trick. First, just have students create an F# on the upside mouthpiece and barrel. This could be enough of a project on the first attempt. Students will need to adjust the angle of the mouthpiece, as well as the amount of reed that they put in their mouth. If students mention that it tickles, tell them that it shouldn’t tickle if their lips are firm enough; it will only tickle if their lips are too loose (great embouchure firming trick as well!). Once they are able to produce a tone, have them try to quickly articulate. The great thing about this trick is that it is impossible to thwat tongue. The tongue can only articulate the reed if the tongue is striking high enough. If they use too much tongue and/or tongue too low, they will miss the reed altogether and awkwardly hit the mouthpiece instead. Immediately have students turn the mouthpiece and barrel right side up and start quickly tonguing again. Hopefully you notice a pleasant rise in pitch and clarity of tonguing!
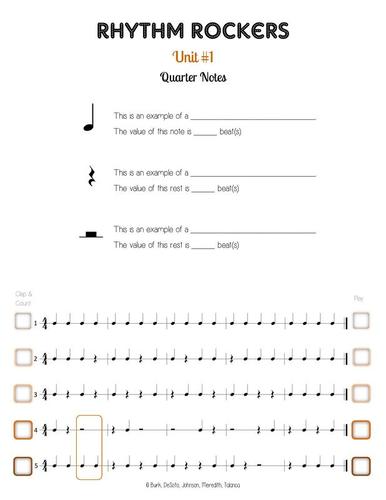
You will need to hear every student independently articulate daily for quite a while to make sure that no bad habits appear. Which leads me to my next item… The Rhythm Rockers Advantage! One of my favorite things about Rhythm Rockers is having the students earn their “Play” stickers on the right side of the page. After we are about a week into tonguing, I have students start earning these stickers. The kids think they are simply playing the rhythms and earning stickers, while I’m secretly giving feedback on tone, air speed, embouchure, breathing locations (NOT THE BARLINES! PLAN YOUR BREATHING!), note length, volume, pitch, and most importantly, articulating!! We have our students play Rhythm Rockers with only the small part of their instrument, in order to isolate this super important articulation skill without having to worry about holding and playing the entire instrument that may end up masking some fundamental issues. It’s a win win; the students are excited to earn a sticker, and we enjoy the opportunity to hear them articulate every day!
0 Comments
|
Authors:
|

 RSS Feed